Showing posts with label Dessert. Show all posts

10 Oct 2011

Tarte Tartin

Upside down caramelized apple tart
We've all made fumbles in the kitchen and this French dessert was apparently created by a mistake.  A French lady (Stephanie Tartin) was originally baking an apple pie, however cooked the apples in the butter and sugar too long, burning it a tad bit, therefore to recover from her mistake, she turned it into an upside down caramelized apple tart.  Voila, the invention of the tarte tartin a very popular and delicious dessert in France. 

Place apples cut-side up
Ingredients:
(makes 8 slices)
-4 apples
-For the caramel:
125 grams butter
1/2 cup sugar
-For the pastry:
250 grams flour
125 grams butter
2-3 tbsp water
1 egg 

Caramelize butter and sugar until golden brown
Instructions:
-Start by making the pastry: cut up the butter into small cubes and combine with the flour.  With your fingers squish the butter with the flour until it becomes like breadcrumbs.  Mix in the egg and water.  Once the pastry becomes soft, but not sticky, cover with saran wrap and stick in the refrigerator.
Poke holes in the pastry and seal the edges
-Peel the apples, cut into quarters, take out the core and cut each quarter into 2-3 large slices.
-Make the caramel: In a skillet, on medium heat, mix together the butter and sugar.  Mix for a few minutes until golden brown.  Do not over cook!
-In a cake pan, pour in the caramel.  Then arrange the apple slices in a circular pattern (place apples cut-side up).
Love the sticky caramel dripping over the apples and pastry!
-Take the pastry out of the frig and roll out the dough.
-Place the rolled pastry over the apples and seal the edges.  With a knife or fork, poke holes in the pastry.
-Bake in the oven at 200 degrees C for 30 minutes or until the pastry is golden brown.
-Once baked, place a plate over the cake pan and flip over carefully.
-Best served warm.  Goes great with a scoop of vanilla ice cream or whipping cream.  Bon appetit!

5 Sept 2011

Flourless Chocolate Cake

This cake only needs 3 ingredients, which does not include flour!  I like this type of minimalist baking, using just the bare necessities.  My friend and I have birthdays 2 days apart, so I baked this cake to celebrate our joyeux anniversaire.  Nothing like a chocolate cake to ease the pain of ageing.     

Ingredients:
-450 grams of your favourite chocolate
-145 grams butter
-5 large eggs

Use 2 different sized pots
Instructions:
-Butter the cake pan, line with parchment paper and butter the parchment paper.
-You need 2 different sized pots.  Simmer water in the larger pot and and place the chocolate and butter in the smaller pot.  Place smaller pot in the simmering water of the larger pot and mix while everything is melting together.
Carefully fold the egg white into the chocolate
-Once everything is melted and well mixed, set aside to cool.
-Separate the egg whites from the yolk.  Using an electric mixer, whip the egg whites until stiff (looks like a fluffy cloud). 
-Mix the egg yolks and combine to the cooled chocolate mixture. 
Line baking pan with parchment paper.
Easier to take out the cake after baking.
-Add bit by bit the egg white mixture to the chocolate mixture.  Do not mix!  Fold the egg whites into the chocolate very delicately.  Try not to deflate the mixture.
-Once all of the egg white has disappeared into the chocolate mixture, place everything into the lined baking pan.
-Bake at 190 degrees C for 30 minutes.

Optional:
-Once the cake is cooled, place in the refrigerator and serve after a couple of hours.
-Sprinkle with icing sugar, decorate with strawberries or raspberries and top off with whipping cream.
-Serve with a side of vanilla ice cream.

5 Apr 2011

Banana Chocolate Triangles

The combination of bananas, chocolate and whipping cream makes for a great end of meal dessert!  Not a light dessert, but definitely a delicious one!  These triangles can be prepared in advance and baked right before serving.

Ingredients:
(makes 8 triangles)
-2 bananas
-2-1/2 tablespoons white rum
-2 tablespoons butter
-2 tablespoons sugar
-16 small chocolate squares
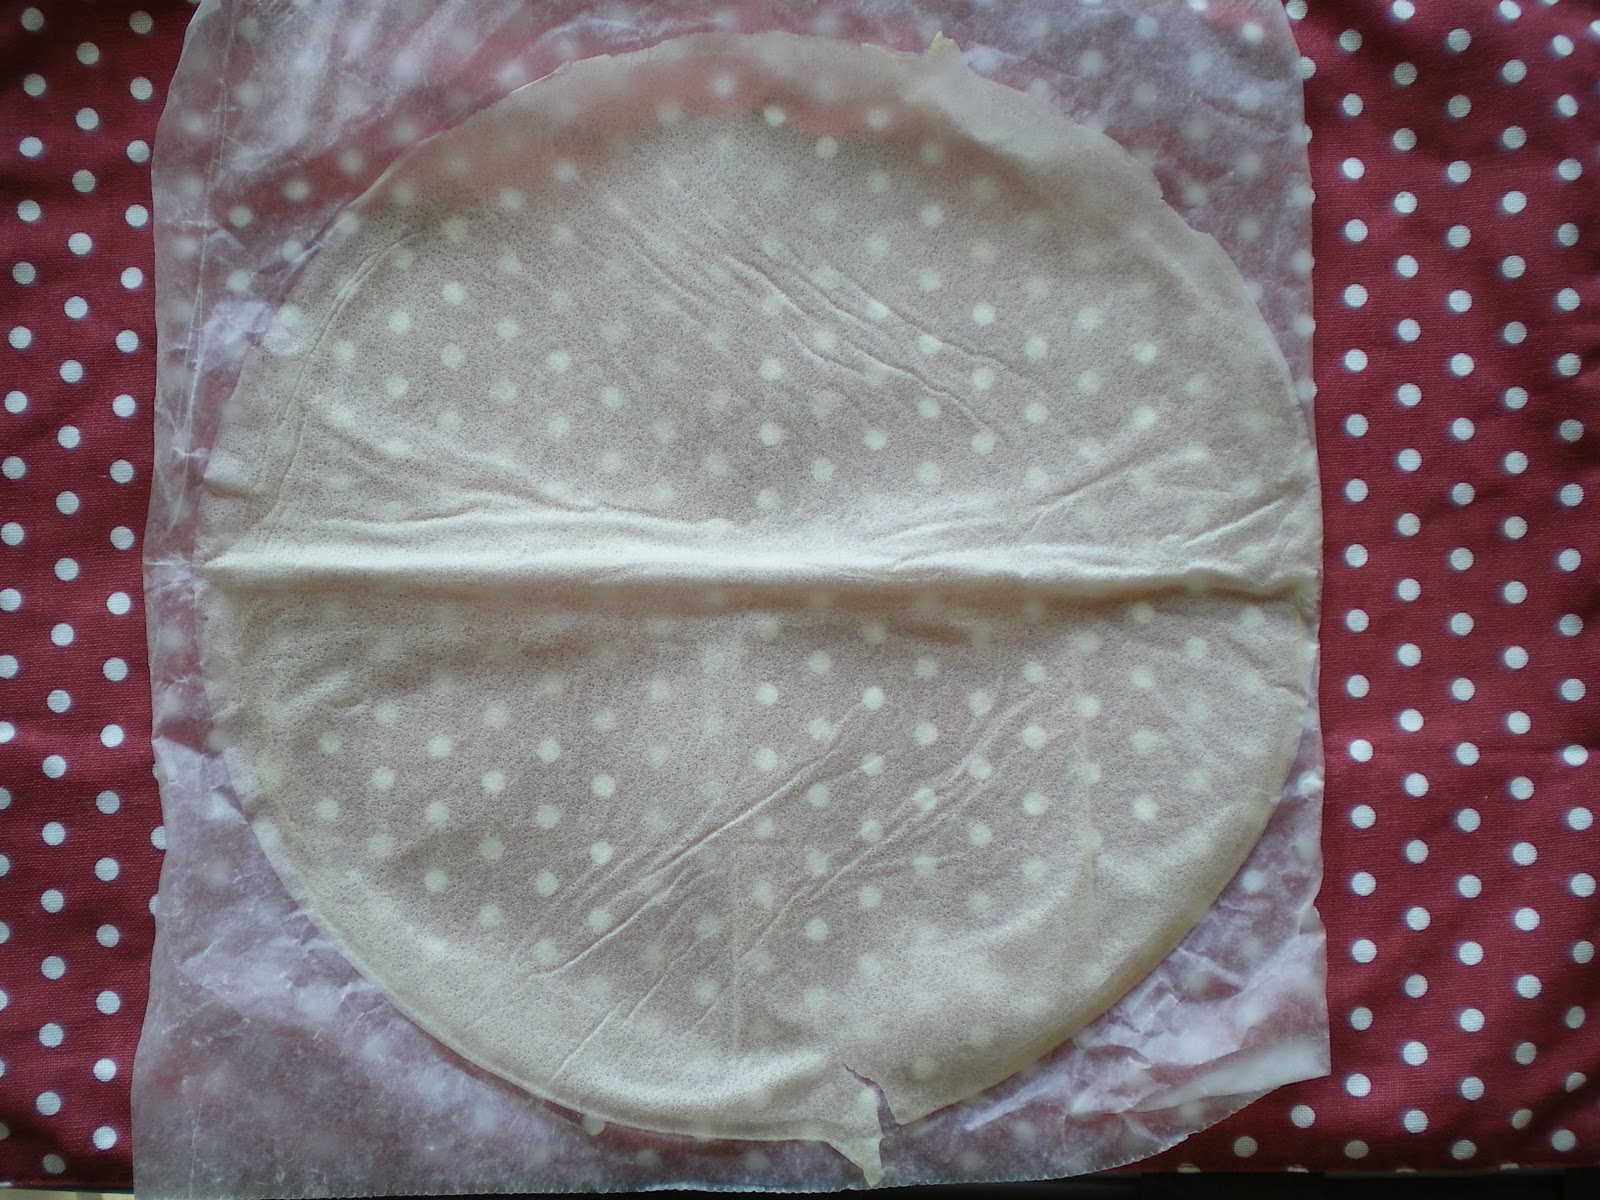
-4 feuilles de brick (I think it's called phyllo pastry in English or use spring roll wrappers).
Instructions:
-Peel the bananas and slice.
-On medium heat melt butter in a fry pan and eventually add the bananas.  Stir often.  Sprinkle the sugar on top and mix well.
-Once the bananas are mush like (approximate 5  minutes) add the rum and let it absorb into the banana mixture.
-Once the rum has absorbed into the banana mixture, let it cool, before making the triangles.
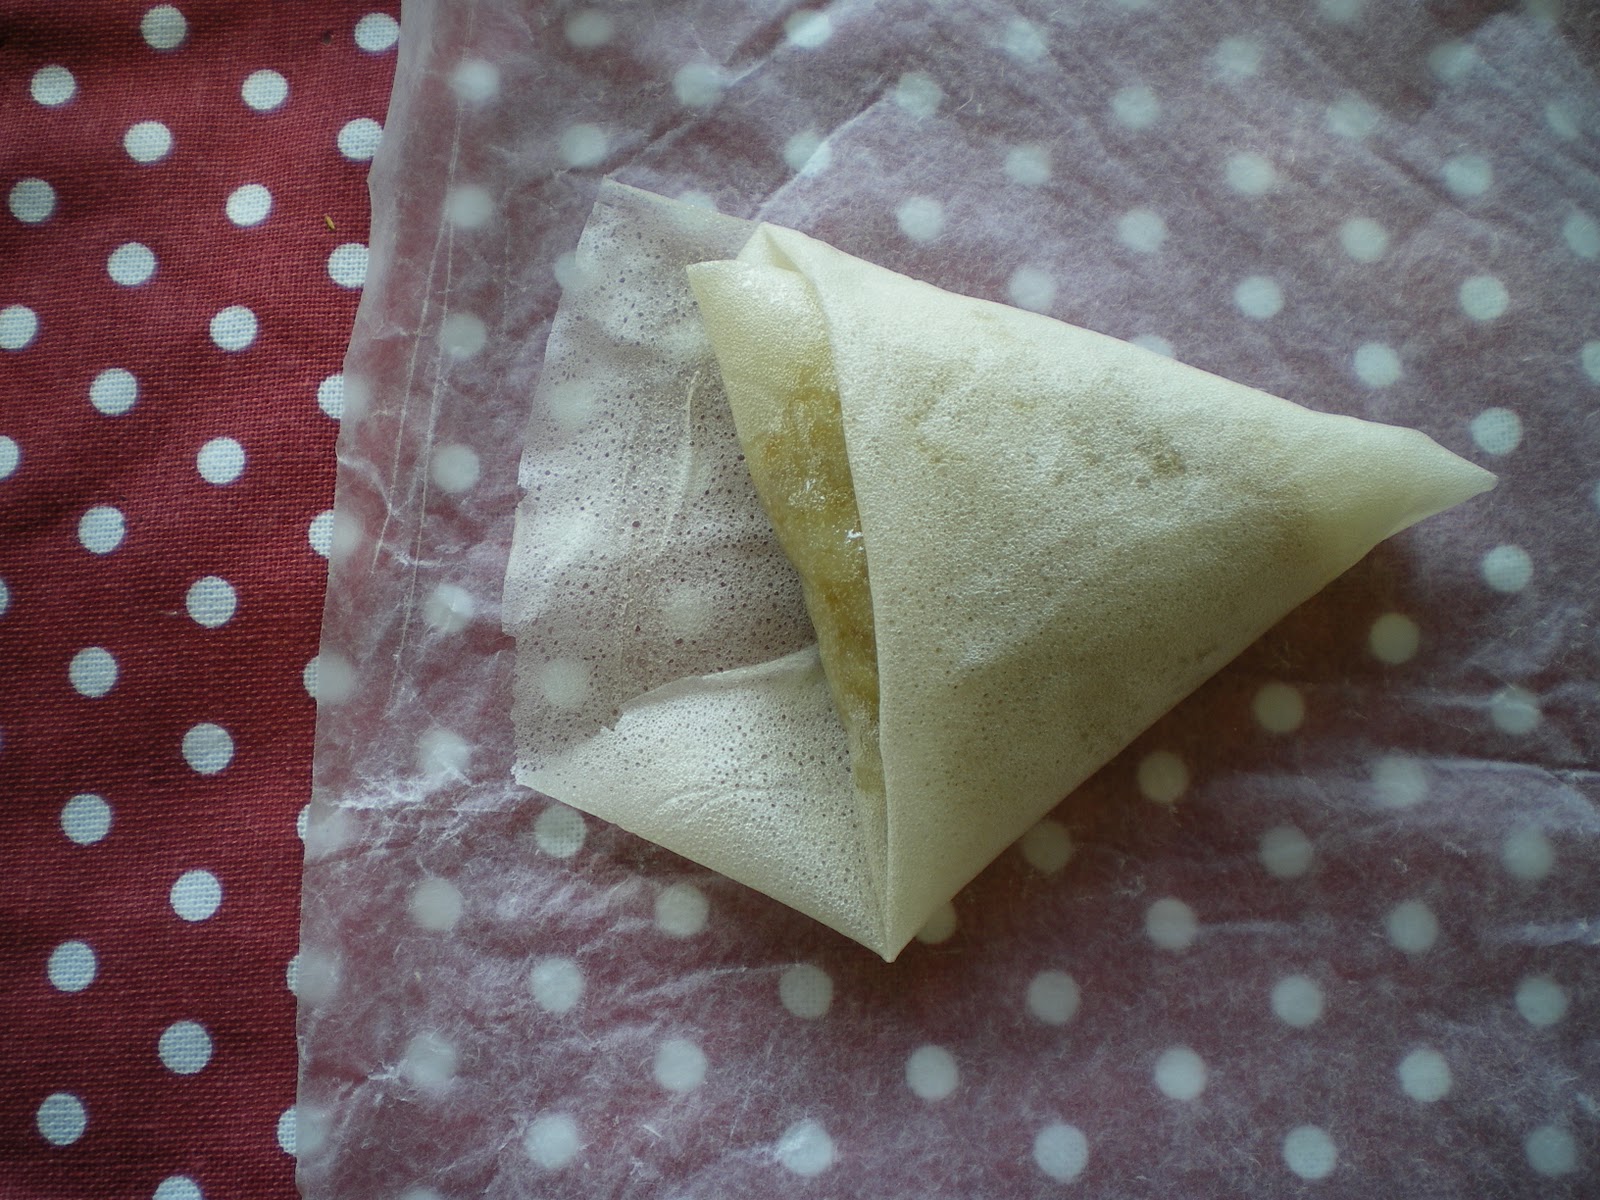
-Follow photo instructions below to make the triangles.  Do not over stuff!
-Bake triangles in the oven at 200 degrees C for 15 minutes or until the exterior is golden and crusty.
-Serve immediately and warm.

Optional:
-Goes great with a scoop of vanilla icecream.
-Decorate with whipping cream and chocolate.

1.  Cut in half.
2. Place the round edge down.


3. Place the mixture (about 1 tbsp) +
2 chocolate squares near top corner.
4. Take the bottom of the pastry and
fold up towards the banana mix.


5. Take the top right corner and fold
down.  This makes a mini-triangle.
6. Take the bottom right corner and fold up
to the top line, making a big triangle.


7. Take the top right corner and fold to the
bottom line, keeping the triangle shape.
8. Take the bottom right corner and fold to
the top line, keeping the triangle shape.


9. With the leftover pastry bit,
tuck into the fold.


8 Nov 2010

A Very Berry Yogurt Cake

I learned this simple recipe from my belle-mère.  It's a typical French cake, gateau au yaourt.  She conveniently uses the yogurt pot/container to measure the sugar, flour and vegetable oil.  Instead of berries, you can add any favourite toppings on this cake, such as apples, apricots, coconut flakes, lemons, etc. 


Ingredients:
-1 yogurt pot (125 grams)
-2 yogurt pots of sugar
-3 yogurt pots of flour
-1/2 yogurt pot of vegetable oil
-2 eggs
-11 grams of baking powder
-1 cup of frozen assorted berries


Instructions:
-Mix together the yogurt, sugar, flour, vegetable oil, eggs and baking powder.
-Grease a baking pan and line with parchment paper.
-Add the cake mixture into the baking pan.
-Top the cake with the berries.
-Bake in the oven at 200 degree C for 25 minutes.
-Stick a toothpick in the middle of the cake.  If it comes out clean, the cake is done.
-Cool on a cake rack for 10 minutes and serve.

17 Oct 2010

Chocolate Pecan Cookies

I am Cookie Monster's sister.  If there are cookies around, I do get the same googly eyes and scream "me want cookie, me eat cookie!"  I may not have the blue fur, but I do have the same uncontrollable appetite as the Cookie Monster, especially for these chocolate pecan cookies.  Goes great with a glass of milk.


Ingredients:
-1 cup of chopped pecans
-1/3 cup of chopped chocolate
-1/2 cup (110 grams) of butter
-1/3 cup of sugar
-1 teaspoon of vanilla extract
-1 cup of flour


Instructions:
-Preheat oven 180 degrees C.
-Chop pecans or put through the mixer.
-Cream the butter in an electric mixer.  Add the sugar and eventually the vanilla and flour.
-Fold in the pecans.
-Shape into balls, place on a buttered cookie sheet and gently flatten with the bottom of a glass.
-Finely chop the chocolate.
-In the middle of each cookie, make a little dent with your thumb and fill in with the chocolate.
-Bake in the oven for 15 minutes.  Cool cookies on a wire rack.

28 Sept 2010

Tarte aux Pommes - French Apple Pie

I love homemade apple pie, especially the French way, as it is aesthetically pleasing and tastes great.  For this recipe, I've also made the pie crust from scratch.  It's actually quite easy and I can boast that everything in this recipe is truly homemade from start to finish. By the way, this tart can be eaten hot or cold. 


Ingredients:
-6 apples
-250 grams of flour
-125 grams of butter
-1/4 cup of water
-1 tablespoon of sugar


Instructions:
-For the pie crust, with your fingers, mix together the flour and butter (otherwise use a mixer).  Once the flour and butter is well mixed, start adding the water a little at a time until it forms a nice pie dough.
-Line the pie dish with parchment paper.
-Roll the pastry dough and place on top of the parchment paper in the pie dish.  Stick in the refrigerator. 
-Peel 3 apples, cut out the seeds and cut into small pieces.
-Place apples in a sauce pan over medium to high heat with enough water to cover the apples.
-Boil and stir occasionally for about 20 minutes until you get a nice apple sauce.
-Taste and if needed, sprinkle in a bit of sugar.


-Peel 3 apples, cut into quarters, cut out the seeds and cut into thin slices.
-Take the pie crust out of the refrigerator and pour in the apple sauce. 
-From the outside, start placing the apple slices clockwise.  For the next layer, place them counter clockwise and for the inner layer, place them clockwise.  Sprinkle some sugar on top of the pie and bake for 40 minutes at 200 degrees C.

Optional:
-If you don't have much time, skip the apple sauce and just layer the apple slices in the pie crust.
-Sprinkle some cinnamon on top of the apples before baking.
-Goes great with a scoop of vanilla ice cream - tarte aux pommes a la mode!

8 Aug 2010

Baklava

Hello, my name is Shelly and I am a baklava addict.  I have an overwhelming and uncontrollable desire for this Greek dessert and it is self-destructive, especially to my derriere.  If you have the willpower, baklava is best eaten at least 24 hours after it's made, so that the syrup has time to set in.  It's even better after 2-3 days.  This dessert is highly addictive, so make at your own risk.
Ingredients: 
-200 grams of your preferred mixed nut
-75 grams of melted butter
-1 package of filo pastry
-1 tablespoon of cinnamon and vanilla extract
-3/4 cup of water
-1/2 cup of sugar
-1/2 cup of honey


Brush the pastry with butter
Place nut mixture at the bottom of the pastry


Roll the pastry like a cigar
Cut diagonal pieces


Instruction:

-Grind the nuts in a mixer and add cinnamon.  I have used my preferred mix of almonds, walnuts and hazelnuts.
-The package of filo pastry will have about 10 sheets.  Take 1 sheet and brush it with the melted butter.  Take another sheet, lay it on top of the first sheet and brush with butter.  Repeat this step again, so that you have a total of 3 sheets on top of one another.
-At the end of the 3 layered pastry, lay the nut mixture lengthwise.
-Roll the pastry like a cigar, brushing some extra butter at the end to seal.
-Repeat the steps until you no longer have any pastry.  You should have about 3-4 rolls in total.
-Butter the tops of each roll and cut diagonally into approximately 2 inch pieces.
-Bake at 175 degrees C for 20 minutes or until the top is crisp and golden.
-In the meantime, make the sauce.  Simmer the water and sugar until sugar dissolves.  Add the honey and vanilla to the mixture and stir for approximately 10 minutes under low heat.
-Remove the baklava from the oven and immediately spoon sauce over it.
-For decoration, sprinkle a few pistachio bits on top of each baklava.
-Leave uncovered, otherwise it will become soggy.